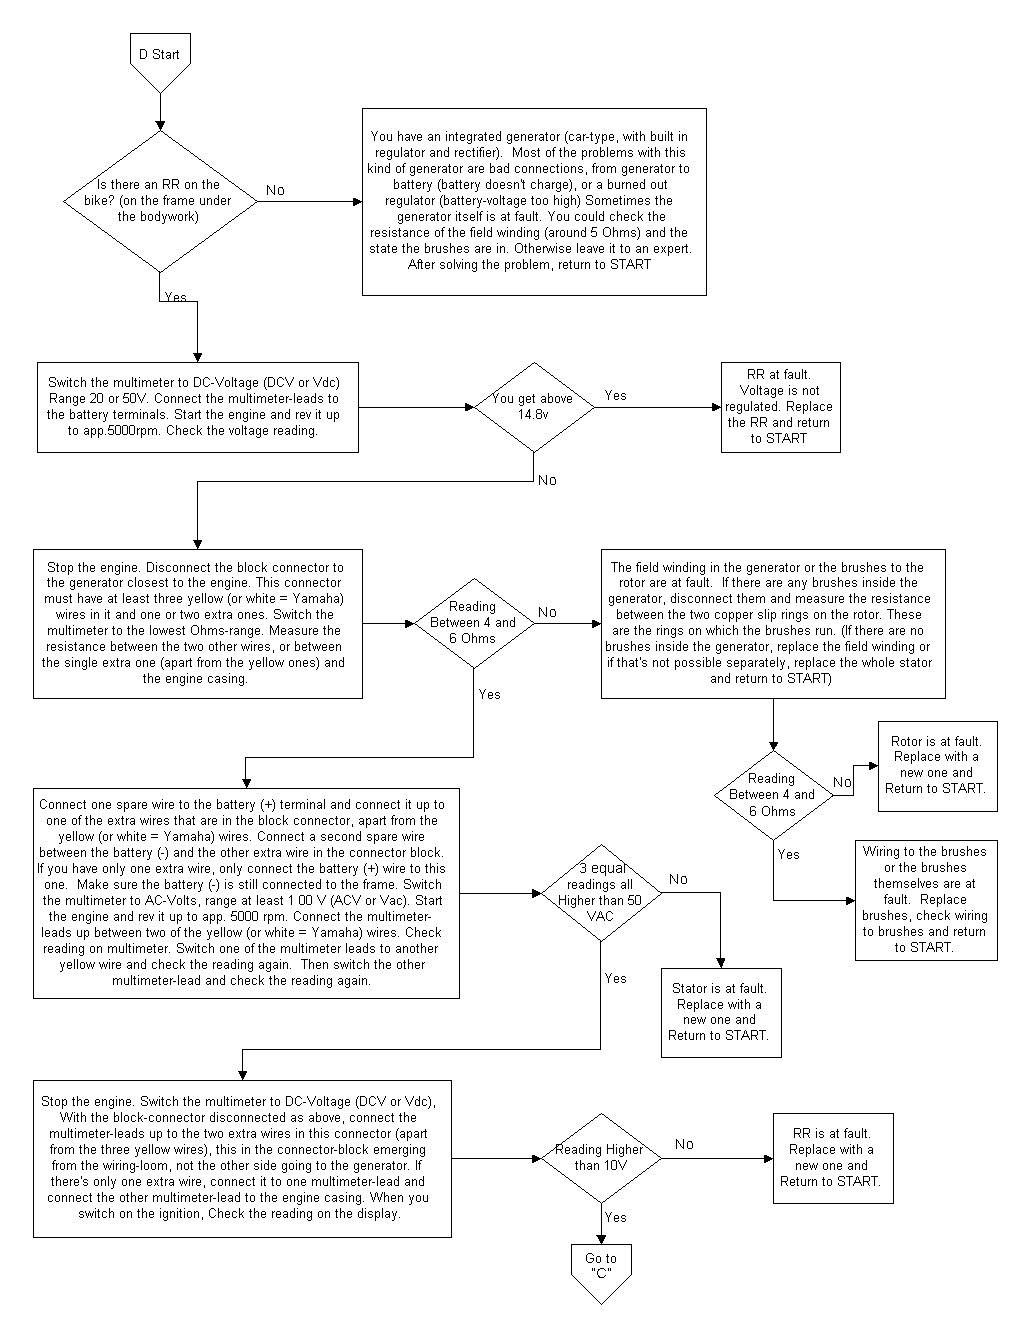
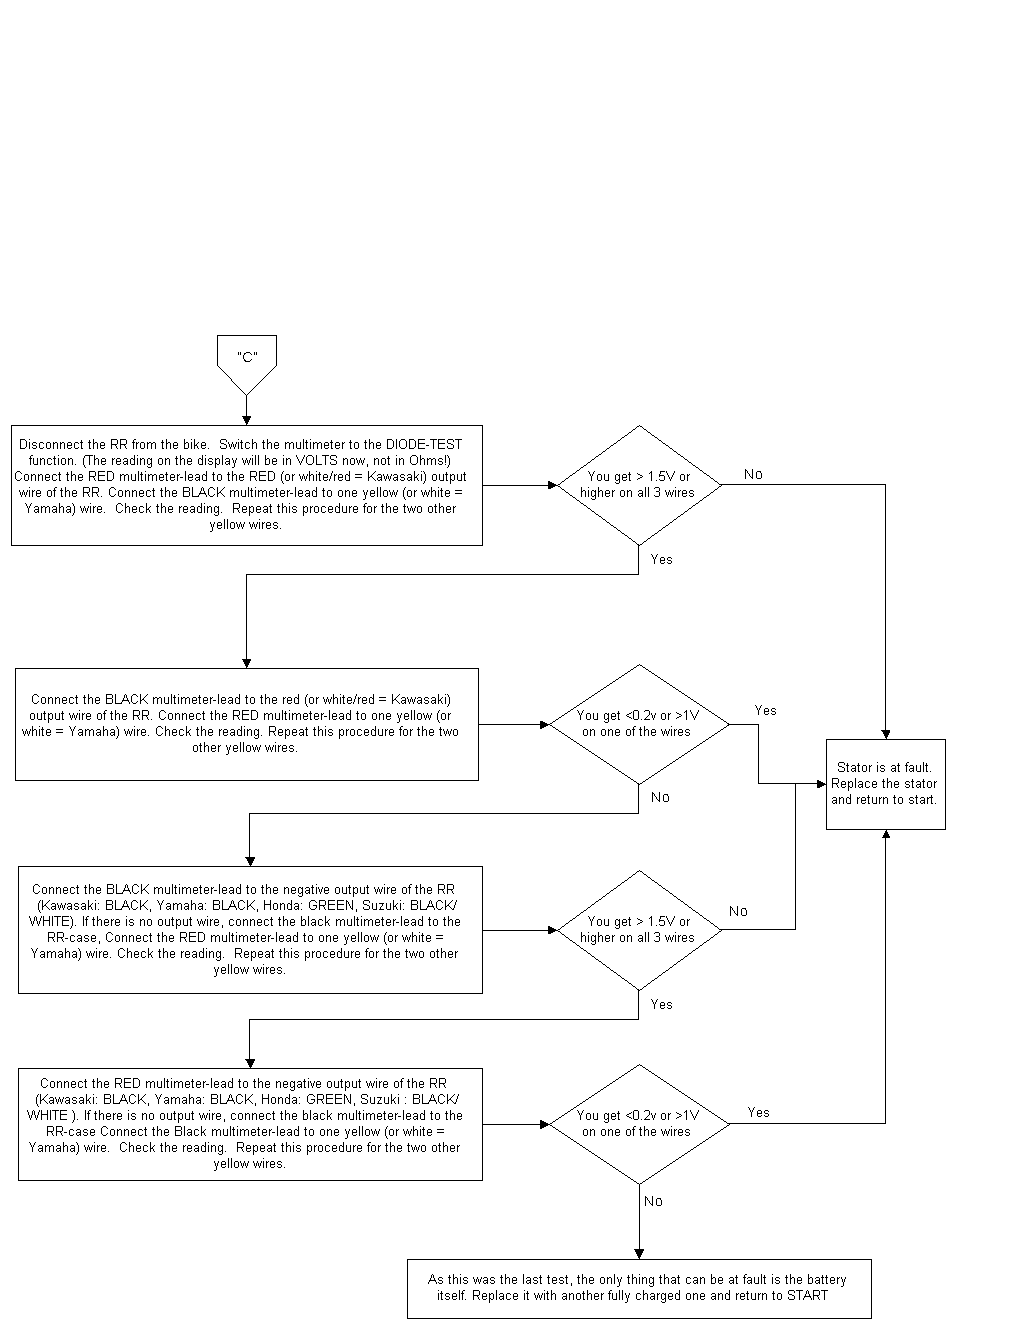
Motorcycle Electrical
Troubleshooting Flowchart
It has been a
while since I’ve tried to write an HTML flowchart. So I decided to put one together. It’s a pretty definitive flowchart of trouble shooting a
motorcycle’s electrical system. This is
free for anyone to use. I hope you
enjoy it!
While I’ve done
a ton of research for it, it may be incomplete or incorrect. Please feel free to send me any corrections
to the flowchart.
READ BEFORE YOU START…
VERY IMPORTANT:
This
faultfinding chart assumes that the user has knowledge of the basics of
electricity (Voltage, current, resistance, etc.), and about electrical systems
on motorcycles in general. If you do
not have this knowledge/experience, find someone that has and let her/him check
the charging-system on the bike. The
use of this faultfinding chart is entirely at the risk of the user. The author cannot be held responsible for
any damage that could arise from the use of this faultfinding chart.
Ø
Fully charge the battery. If the
battery is not fully charged you may get wrong results using this faultfinding
chart. You could just replace it with a battery off another motorcycle that has
a good functioning charging-system.
Ø
Use an accurate digital multimeter!
Ø
RR means Regulator/Rectifier.
Ø This whole
faultfinding chart only works if you have a bike with a combined regulator and
rectifier (= regulator/rectifier) in a single case.
TAKE NOTICE OF THE FOLLOWING:
Suzuki
used on the older GS models three different colors for the three output-wires
of the stator. They were the only
manufacturer doing this. The only reason for this can be to cause confusion,
because the output of all the three wires is the same. The colors on the wires from the stator are
Yellow, White/blue and White/green. On
the Suzuki RR for these models we're talking: Yellow, White/blue and White/red.
JUST THINK THEM ALL BEING YELLOW, and then go on with the tests below.
Note, if you are having problems seeing the image from the above link, you can D/L the three pages of this flow chart in Gif Raster format. Right click and save them locally. Then you can resize them or print them as needed.
Here they are…
![]()
"Inchville" and all pages
contained within are property of MegaGeek Technologies™
They are not to be reproduced without the express, written consent of MegaGeek
Technologies™